Have you ever spent an hour meticulously following a stunning eyeshadow tutorial, only to open your eyes and watch your beautiful creation completely disappear? You blend a perfect smoky eye, and suddenly, it’s just… gone, swallowed by the skin above your crease. Or perhaps you’ve finally mastered a sharp winged liner, but by midday, it has printed a perfect semi-circle high up on your brow bone. If this sounds familiar, welcome. You are not bad at makeup. You likely just have hooded eyes, and you’ve been taught techniques that don’t work for your unique and beautiful canvas.
This guide isn’t just about what makeup to buy; it’s a complete manual on the why and how. We are going to unlearn the “one-size-fits-all” rules and replace them with strategic, effective techniques that celebrate your eye shape. Forget the frustration. We’re here to create space, definition, and looks that last. This is your definitive starting point for mastering makeup for hooded eyes, moving from beginner to confident artist.
What Exactly Are Hooded Eyes?
Before we can master the solution, we must clearly identify the feature. “Hooded eyes” are not a “problem” or a “flaw,” but a common and beautiful anatomical feature. Famous faces like Jennifer Lawrence, Blake Lively, Taylor Swift, and Keira Knightley all have varying degrees of hooded eyes.
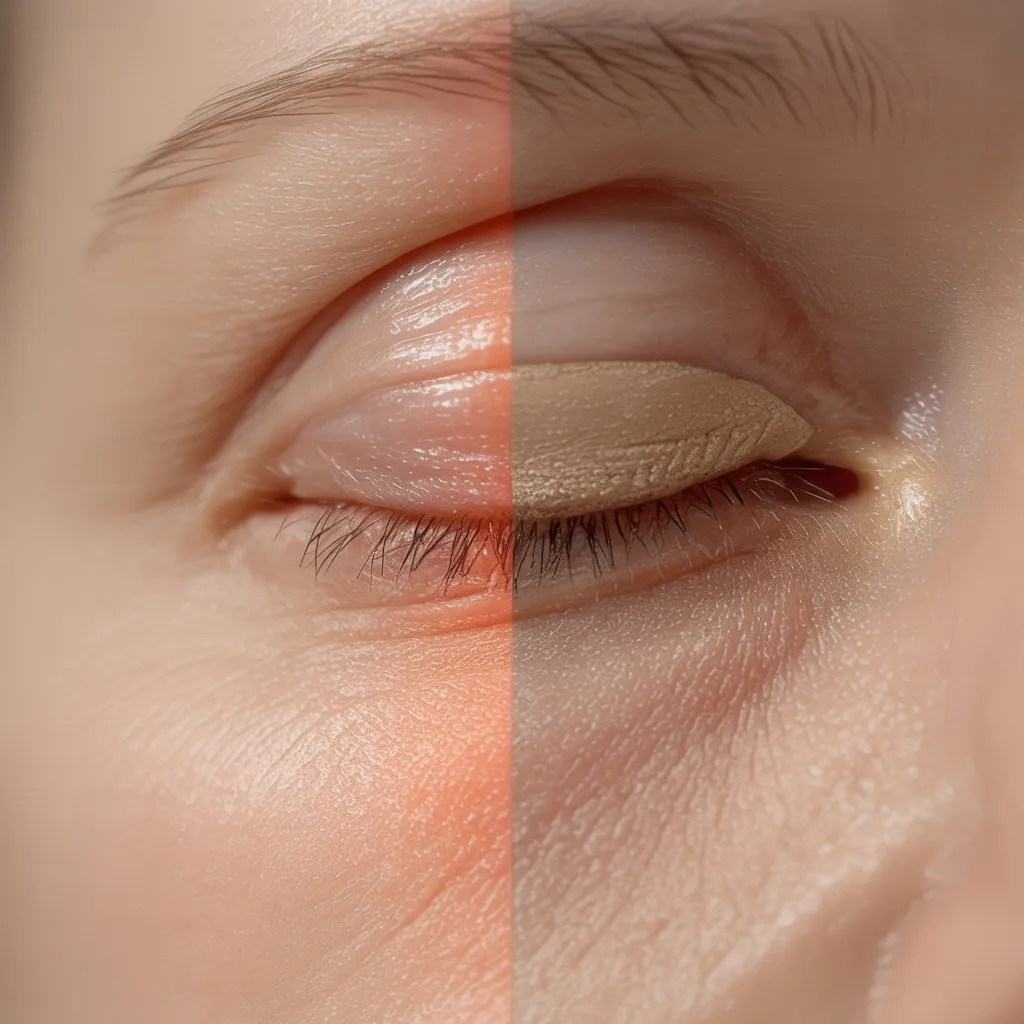
So, what are they? A hooded eye is characterized by an excess of skin that folds down from the brow bone, partially or fully covering the mobile lid (the part of your eyelid that moves when you blink) and obscuring the natural crease.
The Mirror Test: Do You Have Hooded Eyes?
Here’s the simplest way to tell. Stand in front of a mirror and look straight ahead, keeping your face and brows relaxed.
- Can you see your natural crease? When your eye is open, is the fold where your eyelid naturally recesses visible, or is it hidden beneath the skin below your brow bone?
- How much of your mobile lid is visible? Do you see a large, flat canvas of eyelid, or do you see only a small sliver of it, or perhaps none at all, near the lash line?
If your crease is hidden and your mobile lid is mostly covered by that fold of skin, you have hooded eyes. This feature can be something you’re born with, or it can develop over time as skin naturally loses elasticity. The “hood” can be more pronounced on the outer corners or extend across the entire eye. The key takeaway is this: your main canvas for makeup is not the mobile lid, but the visible space above the fold. This single realization is the key to unlocking your makeup potential.
The Core Philosophy: Lifting, Defining, and Preventing Transfer
Makeup application for hooded eyes is a game of illusion. While many tutorials focus on deepening the natural crease, our goal is different. Our philosophy is built on three pillars:
- Lifting: We want to create the illusion of more space and “lift” the eye upward. We will achieve this by strategically placing light and shadow, drawing the eye vertically.
- Defining: Since the natural crease is hidden, we must create a new one. We will manufacture definition in a place where it will actually be seen when your eye is open. This is the most crucial technique you will learn.
- Preventing Transfer: The “hood” of skin often rests on the mobile lid and lash line. This is makeup’s natural enemy. It causes smudging, creasing, and the dreaded “transfer” of eyeliner and mascara onto the brow bone. Our product choices and application will be geared toward maximum longevity and smudge-proofing.
Forget everything you’ve learned about placing a dark “transition” shade in your socket. Your socket isn’t visible. Your new mantra is: “Blend up and out, with your eyes open.”
The Unskippable First Step: The Power of Primer
If you have hooded eyes and you take only one piece of advice from this entire article, let it be this: you must use an eyeshadow primer. This is not a suggestion; it is a golden rule. It is the single most important product in your arsenal.
Why Primer is Non-Negotiable
Remember Pillar #3: Preventing Transfer. The skin-on-skin contact from your hood creates a warm, moist environment that is designed to break down makeup. An eyeshadow primer does several critical things:
- It Creates Grip: It provides a slightly tacky, uniform surface for your shadows to adhere to, preventing them from sliding around or fading.
- It Blocks Oil: Even if you don’t have oily skin, your eyelids produce natural oils. A primer creates a barrier, stopping those oils from dissolving your eyeshadow and liner.
- It Prevents Creasing: It smooths the canvas, filling in any tiny lines and stopping pigment from settling into them.
- It Prevents Transfer: By locking your products in place, it stops your eyeliner and dark shadow from transferring onto your upper brow bone.
- It Boosts Pigment: It makes your eyeshadows appear more vibrant and true to their color in the pan.
A Primer is NOT Concealer
Many beginners try to use concealer as a primer. This is often the worst thing you can do for hooded eyes. Concealers are emollient and designed to blend into the skin; they are not designed to hold other products. They will crease, and they will make your transfer problem worse. Invest in a dedicated, high-quality eyeshadow primer. Look for formulas described as “long-wear,” “smudge-proof,” or “waterproof.” A tiny, rice-grain-sized amount is all you need. Apply a thin layer from your lash line all the way up to your brow bone and let it set for a minute until it feels tacky, not wet. This creates your “bulletproof” canvas.
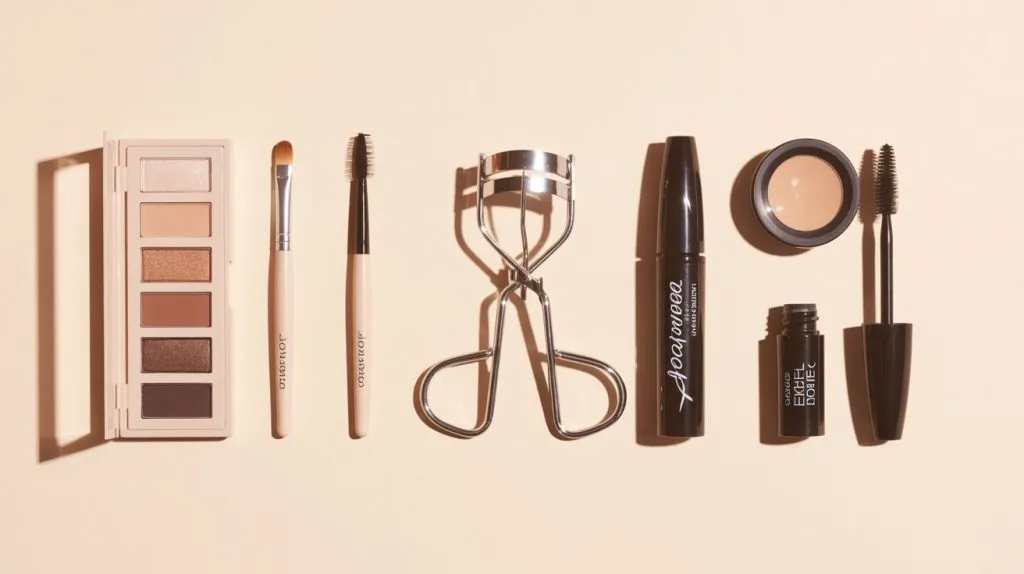
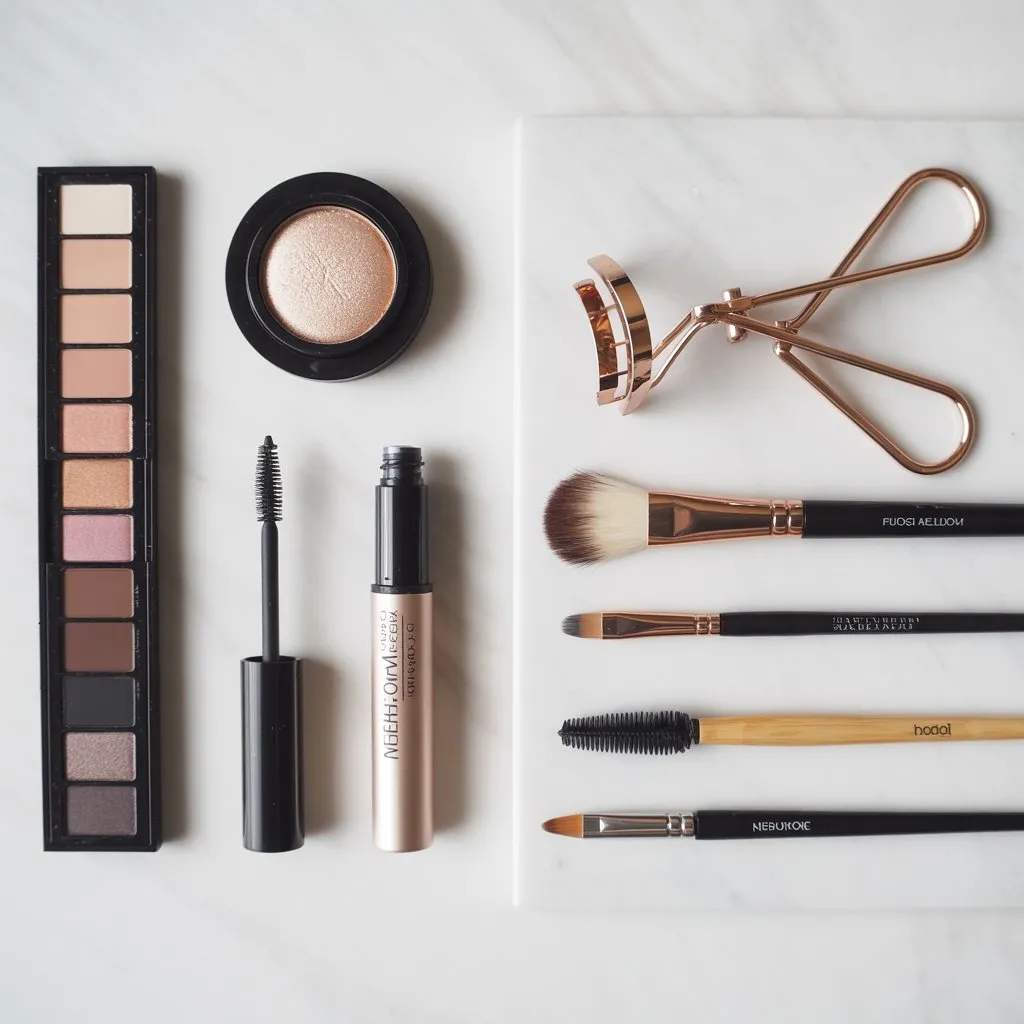
Your Essential Toolkit: Products That Work With You
Now for the “what to use” part. Building your makeup kit is about being strategic. You don’t need a hundred products, but you do need the right ones. For hooded eyes, formula and finish are everything.
Eyeshadows: Matte is Your Best Friend
For beginners with hooded eyes, a high-quality, neutral-matte eyeshadow palette is the single best investment you can make.
- Why Matte? The rule of makeup is simple: matte finishes recede and create shadow, while shimmer finishes advance and highlight. Because your “hood” is the most forward-projecting part of your eye, it catches the light. If you apply a shimmery shadow all over that area, you are essentially putting a giant spotlight on the very thing you’re trying to minimize.
- What You Need: Start with a simple palette containing:
- A matte shade 1-2 shades lighter than your skin tone (to set your primer and highlight).
- A light-to-medium matte “transition” shade (a soft brown, taupe, or peach).
- A deep matte shade (a dark brown, espresso, charcoal, or black) for definition.
- The Formula: Look for matte shadows that are described as “buttery” and “blendable.” A chalky, dry matte is difficult to work with and will look patchy. You want a shadow that can be buffed into a seamless gradient.
Shimmer and Satin: The Strategic Highlight
This doesn’t mean you must banish shimmer forever! Shimmer is beautiful, but it must be used with intent. On hooded eyes, shimmer is not an all-over lid color; it’s a strategic “pop.”
- Where It Goes:
- The Inner Corner: A tiny pop of a light, bright shimmer right in the inner corner of your eye instantly opens up and brightens the entire face.
- The Center of the Mobile Lid: Pat a small amount of shimmer (a light champagne, rose gold, or bronze) only on the tiny part of your mobile lid that is visible right above your lashes. When you blink, this will create a beautiful, light-catching effect without highlighting the hood.
- The Formula: A smooth, finely-milled shimmer or “satin” finish is more flattering than a chunky, glitter-based shadow, which can emphasize skin texture.
Eyeliner: Precision and Staying Power
Eyeliner is the number one frustration point for hooded eyes. A thick line eats up what little visible lid space you have, and a soft pencil transfers in five minutes. We need to be precise and demand performance.
- The Problem: A thick band of black liner will visually close your eye, making it appear much smaller.
- Your Best Options:
- Gel Eyeliner: Applied with a very fine-angled brush, a gel formula gives you a rich, dark line with excellent playtime before it sets to a smudge-proof finish. This is fantastic for tightlining.
- Waterproof Liquid Pen: For an ultra-precise, razor-thin line, a liquid liner with a brush tip (not a felt tip, which can fray) is ideal. The key is to get a truly waterproof, long-wear formula.
- Waterproof Pencil: This is only for your waterline (tightlining) or for smoking out the lower lash line. Do not use a creamy, soft kohl pencil on your upper lash line; it will transfer. Look for 24/7, “waterproof,” or “aqua” in the name.
- The Goal: Your eyeliner should define your lash line and make your lashes look thicker, not take up visible lid space.
Mascara: The Vertical Lift
Mascara is not just a finishing touch; it’s a structural necessity. It’s our primary tool for creating that vertical “lift” we discussed in our philosophy.
- The Tool: An Eyelash Curler: This is as essential as your primer. You must curl your lashes. For hooded eyes, lashes that point straight out can hit the “hood” and cause smudging, and they don’t help open the eye. Curling them up and away from the lid creates an immediate, wide-eyed effect and helps “push back” the hood.
- The Formula: Waterproof or Tubing
- Waterproof: This is the gold standard for preventing smudges. The same oils and moisture that break down your shadow will make regular mascara run or “print” onto your brow bone. A waterproof formula locks on and will not budge.
- Tubing: This is the other fantastic option. Tubing mascaras (which often mention “tubes” or “removal with warm water”) wrap each lash in a tiny, water-resistant polymer tube. They don’t smudge or flake, and they slide off with just warm water, which is great for gentle removal.
- The Goal: Volume at the root and a powerful, upward curl.
Brushes: The Tools of the Trade
You cannot create a soft, blended look with the small sponge applicators that come in palettes. For hooded eyes, precision is key, which means smaller brushes are often better than big, fluffy ones.
- The Non-Negotiable Trio:
- A Small, Tapered Blending Brush: This is your workhorse. “Tapered” means the bristles come to a soft point. This allows you to place your “false crease” color precisely above your fold and blend it out without it spreading everywhere. A big, fluffy brush will apply shadow too high, too quickly.
- A Pencil Brush: This is a small, dense, pointed brush. It’s your detailer. You’ll use this for smudging shadow along the lower lash line and for placing that all-important inner-corner highlight.
- A Small, Flat Shader Brush: This is a flat, stiff-ish brush used to pack or pat color onto your mobile lid. You’ll use this to apply that strategic pop of shimmer right near your lashes.
The Foundational Technique: Creating Your Own Crease
This is the most important technique you will ever learn for hooded eyes. We are going to ignore your natural, hidden crease and build a new, visible one.
Step 1: Look Straight Ahead. Sit in front of your mirror. Do not close your eye, do not lift your brow, do not tilt your head. Look directly forward with a relaxed expression. This is how the world sees you, and this is how you must apply your most important shadow.
Step 2: Identify Your “Visible Space.” With your eye open, identify the fold of your hood. Your “visible space” is the skin just above that fold. This is your new canvas.
Step 3: Place Your Transition Shade. Take your small, tapered blending brush and dip it into your light-to-medium matte transition shade (the soft brown or taupe). Tap off any excess.
Step 4: Apply Above the Fold. Looking straight into the mirror, start placing this color just above your natural crease, on that visible skin. Start from the outer corner and sweep the brush in small, back-and-forth windshield-wiper motions. Your brush should be physically touching the skin above the fold, not in the fold.
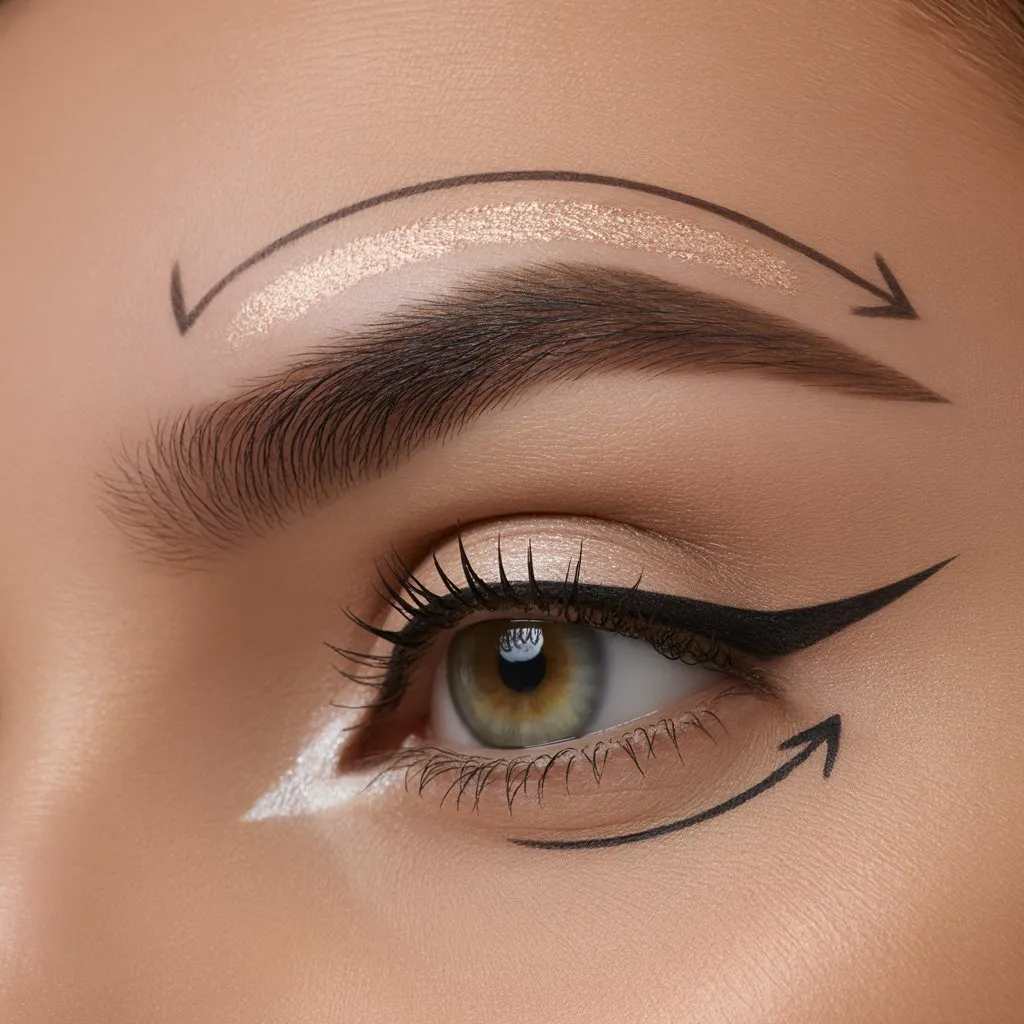
Step 5: Blend Up and Out. The motion for blending is always up toward the tail of your brow and out past the corner of your eye. This “up and out” motion creates the “lift” we’re aiming for. It’s counter-intuitive; it might feel like you’re applying shadow way too high.
Step 6: Check Your Work. Keep your eye open and check. You should see a soft, diffused shadow above your hood. Now, close your eye. You’ll see your mobile lid, your natural crease, and then a “gap” of space… and then your new, blended shadow. This is correct! This technique ensures that when your eye is open, the definition is perfectly visible, faking a deeper-set, lifted eye.
Step 7: Deepen the Outer V. Take your deeper matte shadow (dark brown or espresso) on the very tip of the same brush. Tapping off the excess is crucial. Keep your eye open and tap this color onto the outermost corner of your “new” crease, blending it slightly into the transition shade, but keeping it concentrated on the outer third. This adds dimension and elongates the eye.
Mastering Eyeliner for Hooded Eyes
Eyeliner application is a precise surgical strike. Our goal is to define the lash line without consuming any visible lid space.
The Art of Tightlining
Tightlining is your new best friend. This is the technique of applying eyeliner only to the upper waterline (the “shelf” of skin under your top lashes).
- How to do it: Gently lift your upper lashes with one finger. Take your waterproof pencil or your gel liner on a small, flat brush, and press the product in between the roots of your lashes and onto that upper waterline.
- The Effect: This makes your lash bed look incredibly dark, dense, and full, as if you have thousands of lashes. It provides all the definition of eyeliner without drawing a single line on your precious mobile lid space. For many, this is all the liner they need for an everyday look.
The “Micro-Liner” Technique
If you love the look of a liquid liner, the key is to go thin. As thin as you can possibly make it. Use a liquid liner pen with a precise brush tip. Rest your pinky on your cheek for stability. Look down into a mirror and draw a line that is only in the lash roots themselves. The goal is to tint the skin between the lashes, not to draw a line above them.
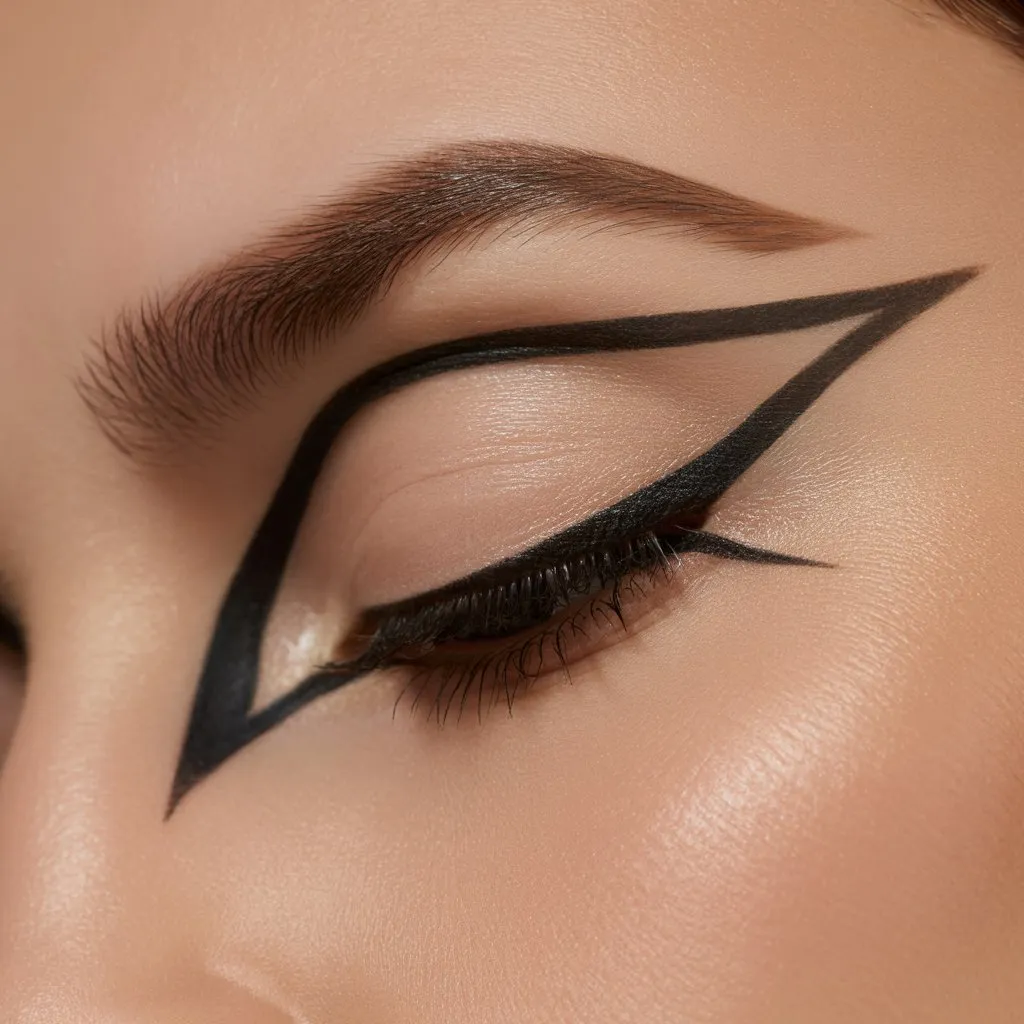
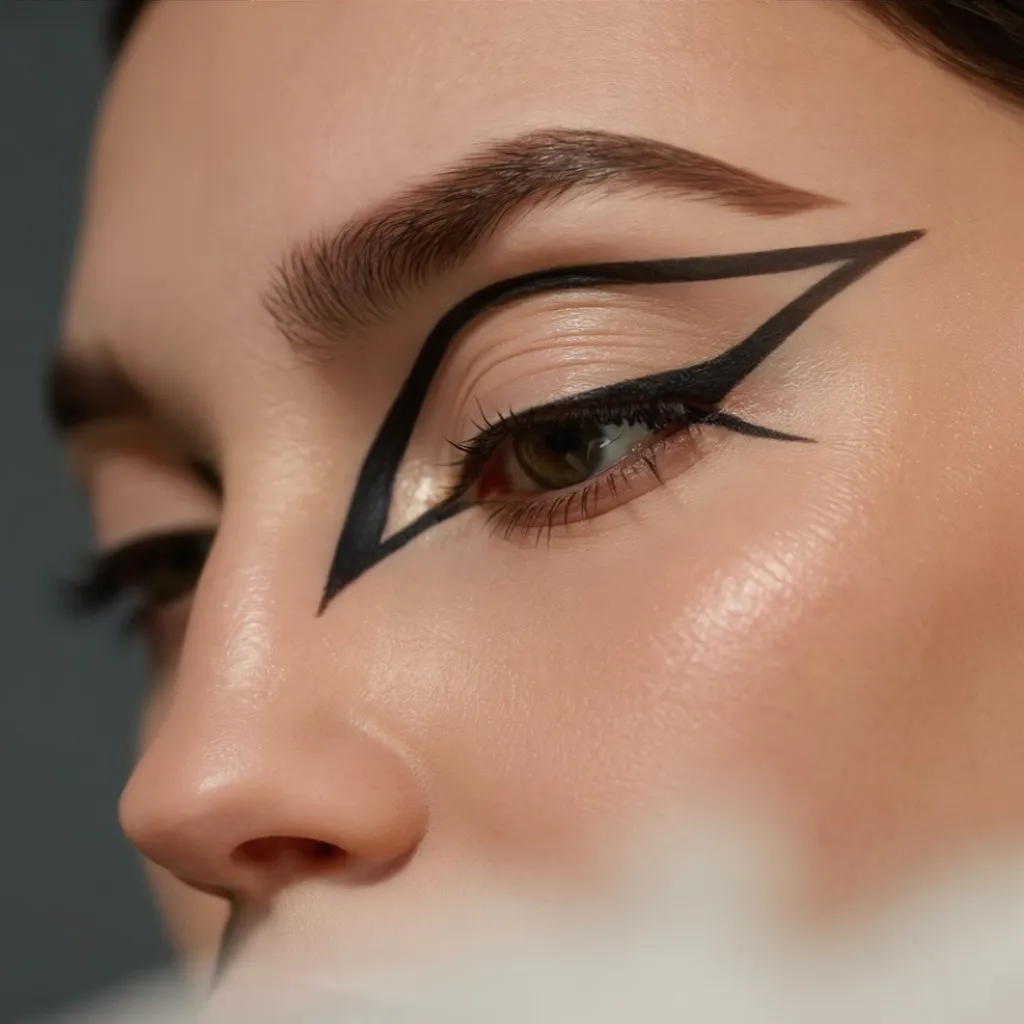
The “Bat Wing” or “Puppy Liner” Technique
What about a wing? A traditional winged liner (a single, sweeping-up line) often gets distorted, broken, or hidden by the hood.
- The Bat Wing: This is a more advanced technique, but it’s brilliant. Look straight ahead with your eye open. Draw the flick of your wing first, from the outer corner up toward your brow tail. Then, from the tip of that flick, draw a second line straight across (horizontally) toward your mobile lid, connecting it below the hood. When you close your eye, it will look like a strange, angular “bat wing” shape with a gap. But when you open your eye, the hood covers the “gap,” and you’re left with a perfect, straight, lifted wing.
- The Puppy Liner: An easier alternative is the “puppy liner.” Instead of flicking the liner up, follow the natural curve of your upper lash line and extend it slightly down and out. This creates a rounded, “puppy dog” effect that is very flattering, open, and avoids the “hood” fold entirely.
The Smoky Lower Lash Line
Don’t neglect your lower lashes! Adding definition here helps to balance the eye. However, a harsh black pencil in the lower waterline can make your eyes look smaller.
- The Best Method: Take your pencil brush and that same matte transition or deep-brown shadow you used on top. Buff it right into the roots of your lower lashes. This creates a soft, smoky, and diffused definition that opens the eye rather than closing it. Connect this at the outer corner to your upper shadow to create one seamless, lifted shape.
Brows and Highlights: Framing the Masterpiece
Your makeup doesn’t exist in a vacuum. The elements around your eyes are critical for creating that lifted look.
Brows as the “Frame”
Your eyebrows are the frame for your artwork. For hooded eyes, a well-groomed brow can provide an instant “lift.”
- The Shape: A slightly arched, elongated brow is ideal. The “arch” creates more vertical space between your brow and your eye, making the whole area look more lifted. Avoid very thick, heavy, or straight brows, which can “weigh down” the eye.
- The Product: Use a fine-tipped brow pencil or a brow powder to fill in any sparse areas, focusing on defining the arch and extending the tail. The tail of your brow should point out or slightly up toward your temple, not down toward your cheekbone.
Strategic Highlighting
We already talked about shimmer, but highlighting refers to using a light-colored, often matte (or satin), shadow to bring specific areas forward.
- The Brow Bone: Apply your light, matte (or satin-finish) shadow only directly under the highest point of your brow’s arch. Do not sweep a shimmery highlight all the way from one end of your brow to the other. This will highlight the entire hood. A small, strategic pop of light just under the arch creates another point of “lift.”
- The Inner Corner: As mentioned before, a pop of light (shimmery or matte) in the inner corner is a must. It draws light inward and forward, making your eyes look wider and more awake.
Common Pitfalls for Hooded Eyes (And How to Fix Them)
It’s easy to fall into old habits. Here are the most common mistakes beginners make and the simple corrections.
Pitfall 1: Applying shimmer all over the lid and up to the brow.
- Why it’s a problem: This makes your entire lid, including the hood, project forward. It’s like aiming a spotlight at the problem.
- The Fix: Use matte shadows for all your “sculpting” work (your false crease). Save your shimmer only for a tiny pop on the inner corner and the very center of your mobile lid, near the lashes.
Pitfall 2: A thick, heavy black eyeliner line on the upper lid.
- Why it’s a problem: This completely covers your small, visible mobile lid, making your eye look tiny and “swallowed” by the liner.
- The Fix: Switch to tightlining your upper waterline. If you must have a line on top, use a liquid pen to draw a “micro-liner” as thin as a piece of thread.
Pitfall 3: Applying your “crease” color in your natural, hidden crease.
- Why it’s a problem: The second you open your eye, that color completely vanishes. You’ve wasted your time and the product.
- The Fix: Apply your shadow with your EYES OPEN, looking straight ahead. Place the color above the fold, where it will remain visible.
Pitfall 4: Forgetting the lower lash line.
- Why it’s a problem: All the makeup on top can look heavy and unbalanced, visually pulling the eye down.
- The Fix: Use a pencil brush to smoke a bit of your matte transition shadow into the lower lash roots. This balances the look and opens the eye.
Pitfall 5: Mascara smudges on the brow bone.
- Why it’s a problem: Your long, beautiful lashes are hitting the “hood.”
- The Fix: First, curl your lashes very well. Second, switch to a waterproof or tubing mascara formula. Third, after applying mascara, try to look down for about 30 seconds until it’s fully dry, preventing it from printing while wet.
Imagine this: A graphic, split-screen “Don’t” and “Do” comparison.
- “Don’t” side: An eye with thick black liner, shimmer up to the brow, and shadow placed in the hidden crease (looking muddy and small).
- “Do” side: The same eye, but with a “false crease” blended high, a tightlined upper lash line, a highlighted inner corner, and curled lashes (looking open, lifted, and defined).
Embrace Your Eye Shape
Makeup for hooded eyes is not about “fixing” a flaw. It’s about learning a new, specialized set of skills, much like a painter learning to work on a different kind of canvas. Your eye shape is beautiful, and it’s capable of handling everything from a soft, natural, ‘no-makeup’ look to a dramatic, smoky eye.
The key is to unlearn the generic rules and start working with your anatomy. Use primer, build your definition above the fold, keep your liner thin, and curl your lashes. It will take practice. Your first “false crease” might look a little strange, and your first “bat wing” will probably be a mess. That’s okay. Every makeup artist started with that same learning curve.
Be patient with yourself. Grab your mirrors, your small blending brushes, and your matte shadows, and start playing. You have all the information you need to stop feeling frustrated and start creating looks that you truly love.